I apologize for not posting in a while, but I promise...I have definitely been BUSY!
Recently I have been doing a lot of board and batten around my house, starting with my stairs...
before:

after:

another before angle:

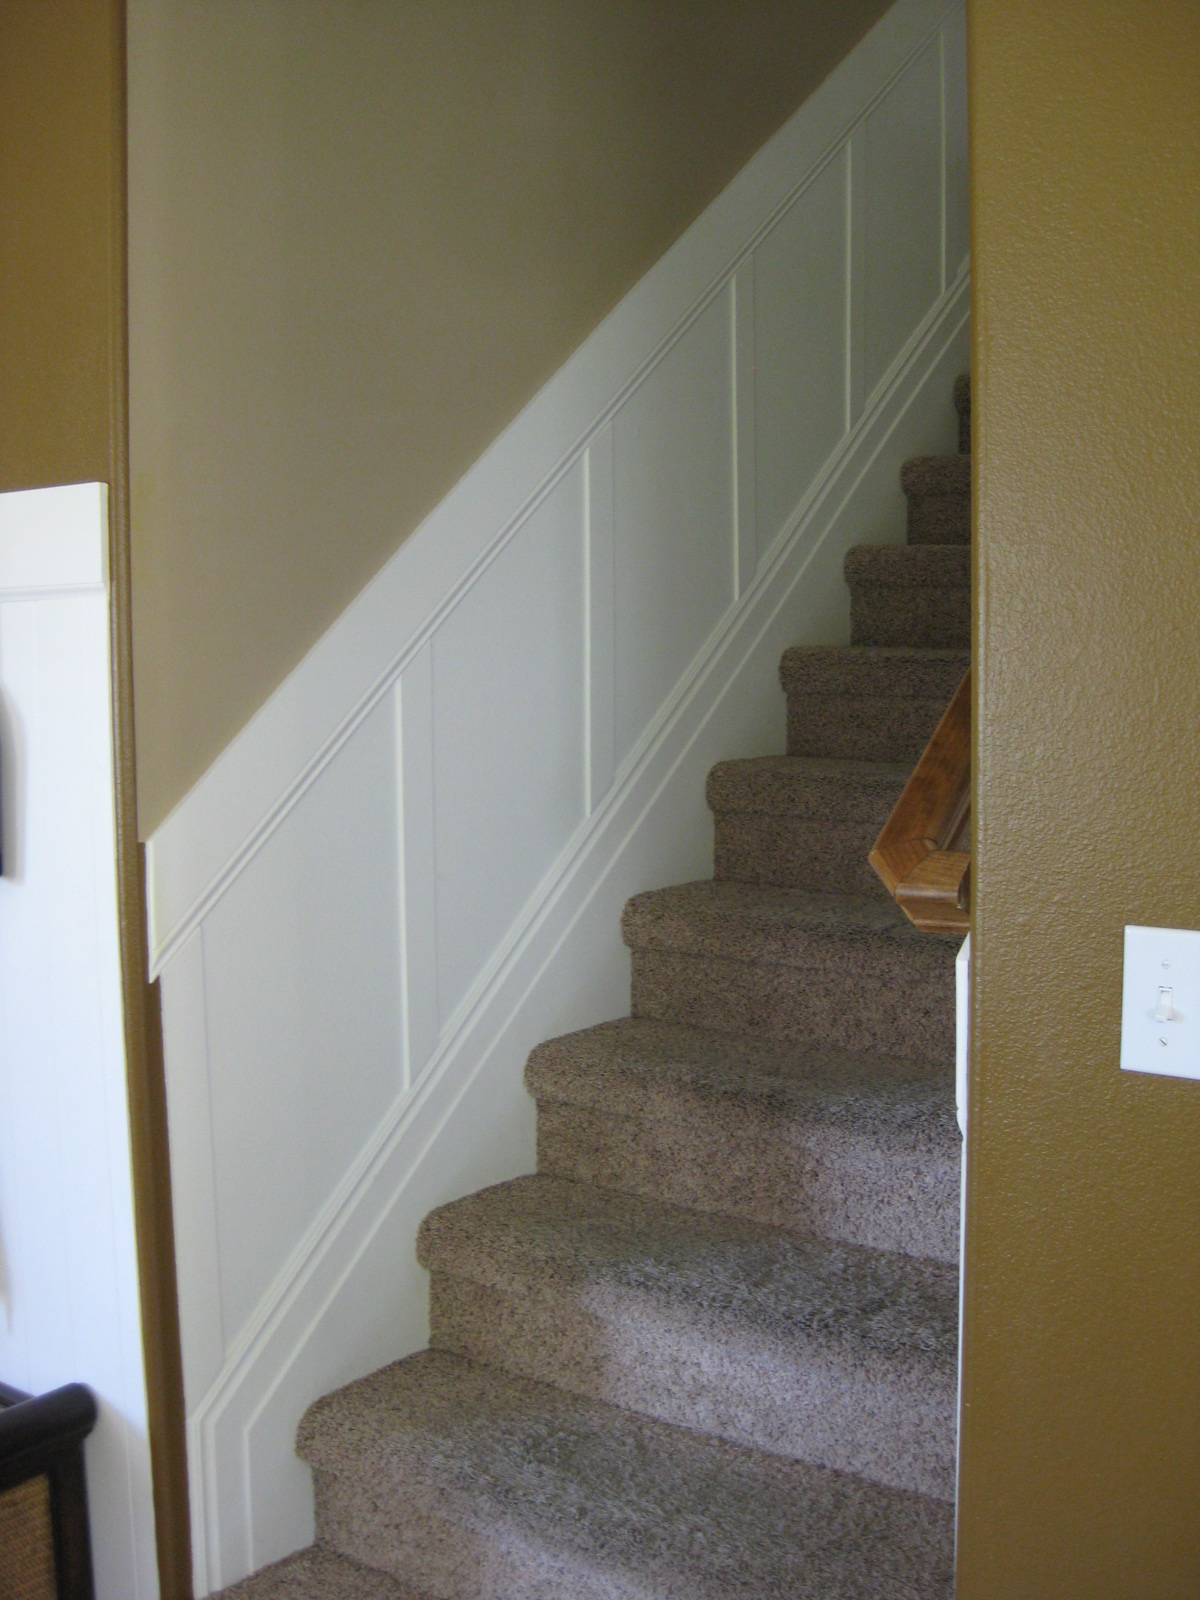
and after:

You may have already seen the first board & batten project that started it all...

Then...after completing the room above I saw this inspirational photo from Thrifty Decor Chick's stairs and thought I should tackle that too!!

Here are a few other great stairwell board & batten that I found -


And here is how I did it, it is really quite easy...
I started off with these runner boards our builder put in when we built our house 7 years ago -

Next I measured 18 inches parallel to the baseboards all the way up the stairs and drew a line -

Because my baseboards have a thin edge on top I knew I needed to find a board that was thin enough to fit against it, as well as a top piece to connect creating the chair well.
I ended up using a tall baseboard and flipped it upside down so the thin top of it was now the bottom and the same width as the board I was going to connect them with. I started by lining up the baseboard along the penciled line I drew along the stairs -

Then I spaced these thin boards every 19 inches apart along the stairs. The trickiest part is making the angled cuts. To do this I simply lined my vertical board up making sure it was level, and drew a line where I needed it to be cut to fit against the top and bottom boards...then cut, cut, cut! -

For the edges at the bottom of the stairs I took my sander and rounded them so they wouldn't scratch anyone -

I used wood filler to fill the spaces in between the top and bottoms of my vertical boards, filled in my nail holes, sanded, primed, and painted!

(Please disregard my gross carpet! Fortunately, we are getting it replaced soon - :)
To continue the flow of the board & batten, I am continuing it upstairs into my hallway and loft. As soon as it is finished I will post the pictures!!