Friday, May 2, 2014

Paris Themed Birthday Party

I'm changing things up today and sharing the crafts and decorations for my daughter's birthday party.
This cutie pie turned 9!  


She loves Paris.  
She's never been, however her obsession for the city of love grew after watching Anastasia several years ago.  So when we celebrated her 9th birthday last month of course her choice would instantly be a Paris themed party. 

Each girl was invited with their very own plane ticket to Paris, France...created by my oldest daughter -


Since they are going to Paris, they need to look and act the part.  I found an EASY tutorial on how to make berets. Each girl was given a beret and a fuzzy sticky mustache to wear.


We put them to good use and had fun in our very own photo booth:


The girls enjoyed crepes, quiche, and cupcakes.


For the table decorations I purchased this 3-D Eiffel Tower Puzzle from Amazon.  I also printed some 3x5 black and white pictures of France and modge podged them onto stained 2x4's I cut to fit the pictures.  For some color I made tissue balls out of red, blue, and white (Frances flag colors) using this easy tutorial. 

What's a party without fun and games?! Our games involved tossing crepe races, stringing the noodles, and of course...our mustache pinata - 


Such a fun day!

Saturday, April 5, 2014

Basement Kitchen Inspirations and Final Picks

It has been years since I could start from scratch on designing my own kitchen.  For the past year I have been contemplating ideas and what I wanted for our basement kitchenette.  It will only have a sink, mini fridge, and a microwave; however, I really wanted lots of counter space and an island for entertaining purposes. 

Here are a few kitchens where I drew my inspirations from:

I Love the dark pendants and bar stools in contrast to all the white- 


Crazy about the granite countertops - 


I love this open shelving, the mix of dark stained wood with the white cabinets, wall sconce over the sink, and the horizontal paneling -


Again, love the mixture of dark wood with white -


 After narrowing down the details of things I loved about each of these above photos, I put together my kitchen plan.

Prepare for a lot of visualizing :)

Here is the wall that my kitchenette will be going on:


I chose Rob Terry Cabinets to complete the job, and below is the drawing they rendered for me -


The cabinets will be white, the floating shelves a dark stained wood, and a wall sconce will go in the space directly above the sink.  A 3x5 island will float adjacent.

Below is another project done by Rob Terry that has the same shaker cabinet door style and crown that I chose for my project.


Below are the final picks for the space-

Farmhouse sink:


Lighting:

(Wall Sconce above sink, I chose a weathered rust finish instead of the aged steel shown below)

 
(Island pendants - Just found and brought these back from Chartreuse on a recent trip to Maryland)


Cabinet Hardware:

 (cabinet knobs)

(cabinet pulls)
 

Sink Faucet:
  

Flooring:

 (A brown/gray hard wood tile)


(will be laid with an offset pattern)


Counter tops:
I never realized how different granite varies.  I thought if you picked a sample, that would be what your counter tops looked like.  I didn't realize how many color variations can occur within one specific name, or how different blocks of the stone have such varied slabs.
Five hours later, I found an available slab from the block I loved the color of. It is a soft white background, with gray and brown flecks and veins.  I LOVE it and can't stop staring at it. :)

(below is the granite River White slab that I chose, a piece of my floor is leaning up against it)


 (a close-up of the River White Granite)


If you are in the market for granite counter tops and live in the area, Creative Granite & Design is fantastic!

Only about another month and I can show you pictures with all of these put together!


Wednesday, April 2, 2014

Finishing the Basement

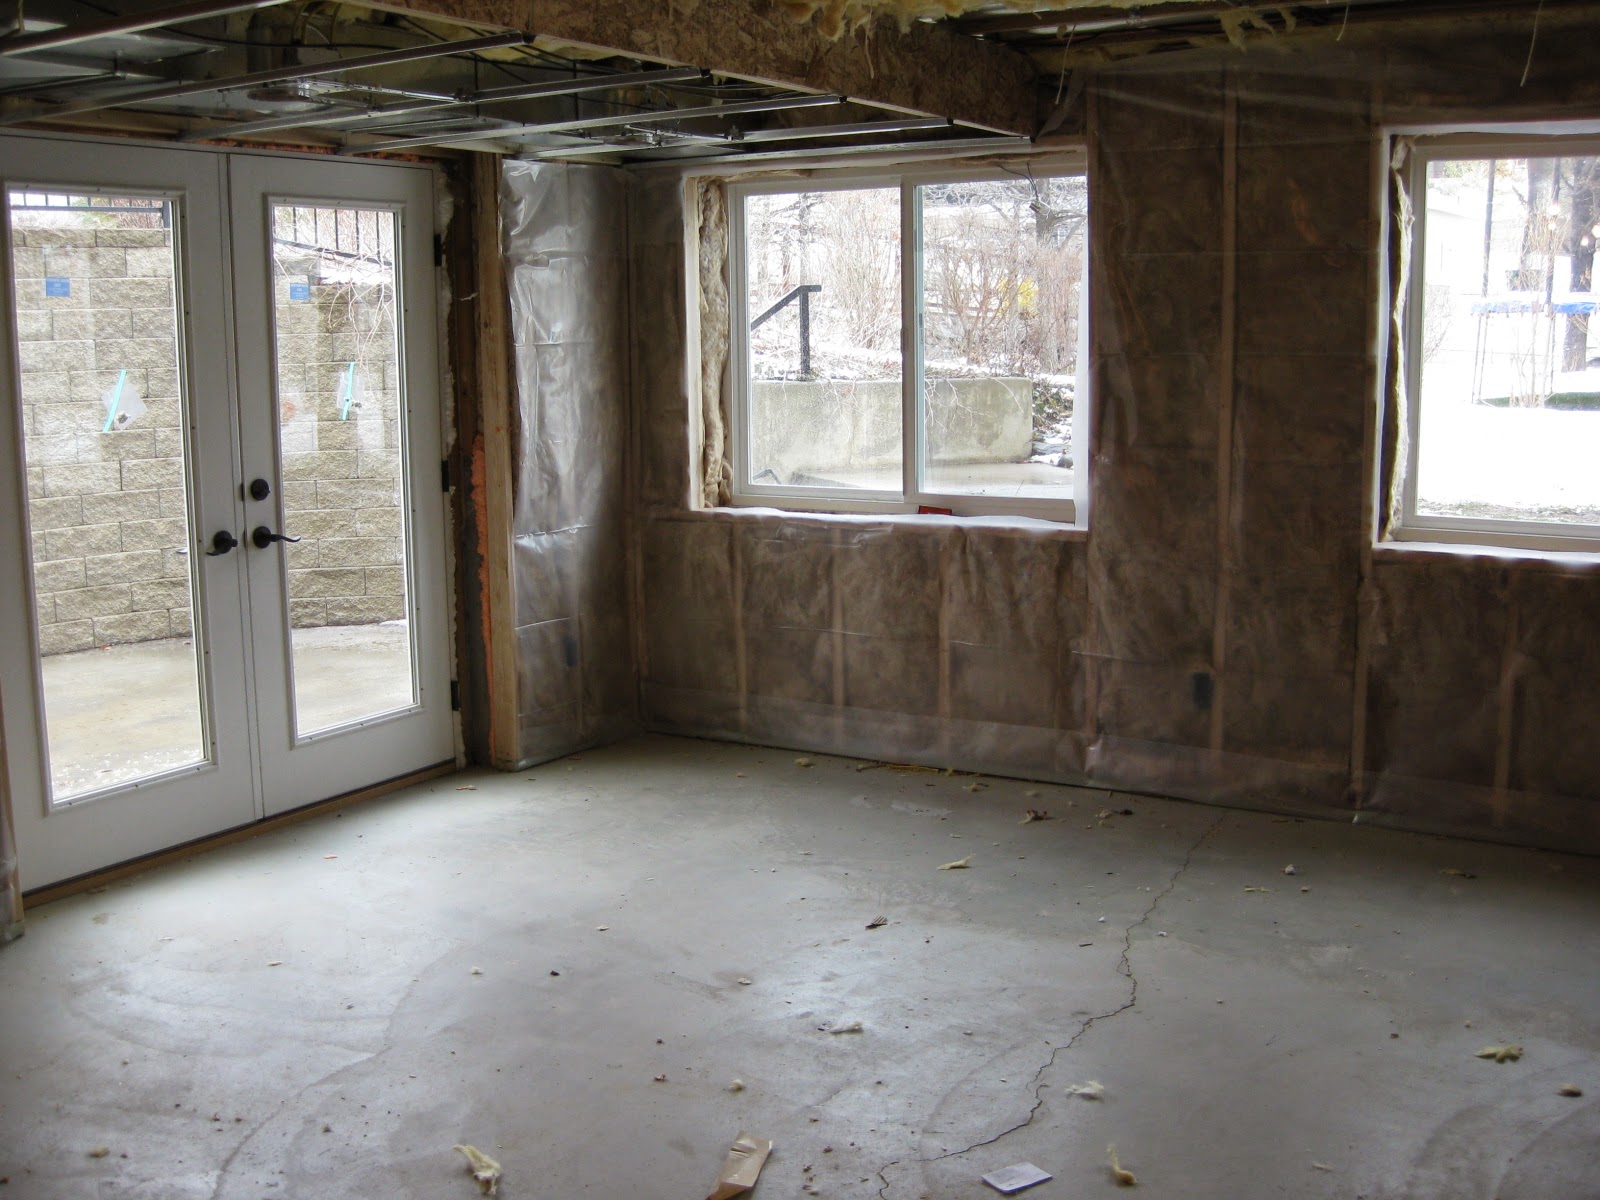
When we moved into our home last March, we quickly realized that while gaining square footage, we lost a number of rooms with the basement being unfinished compared to our previous home's finished basement.  Anxious to have a guest room and another family room for the kids to entertain friends in again, we have finally gotten our ducks in a row to make that happen.  

I played General Contractor on the previous home basement renovation, so I felt a lot more confident doing it a second time around.  

4 way and insulation - Check!  Drywall starts next week...

Family Room:

 (don't mind my elyptical hanging out in the middle of the room) :)


 Mini Kitchen/Dining area - 


Dining Area/Walkout to outdoor patio -


Bathroom:


Bedroom 1: Guest Room


Bedroom 2: Exercise Room


 Of course the pillow fabrics, drapes, light fixtures, couches, etc. were picked out wayyyy before necessary. ;)  Can't wait to show you what those are!

Monday, February 3, 2014

DIY Wreath

I have been searching the internet for a simple olive or boxwood wreath; however, all the ones I have found have been more than I wanted to spend.  

I saw a post this morning for The Easiest Ever DIY Green Wreath from blogger Less-Than-Perfect Life of Bliss, and knew this would be the perfect option for my front door wreath.  

I was already headed out and about today so I included Hobby Lobby as one of my stops.  

This wreath was as easy as she mentioned and I had it up and hanging in no time.  It only cost $20! -


Thanks for the idea and tutorial Julie!

Wednesday, January 29, 2014

New Desk

Can I just start out by saying that we have some of the best neighbors ever?!

We do.  Meet Rhett, Emily, and Gus Gus. 


My kids love to go over to their house and come home with a treat or pocket full of candy, visit with them, watch Emily cook, go to "Rhett's Ranch", and constantly ring their doorbell to walk or play with their dog Gus.  They are the kind of friends/neighbors that drive 30 minutes to sit in a 1 1/2 hr dance recital just to support your daughter, and then drive around trying to find a place open late enough for ice cream. ;) 

They even give away nice furniture...


LOVE this new, completely SOLID desk they gave us.  

You can see our previous one fit perfect in the loft of our other house:


Unfortunately, when we moved it ended up being too small for the new space...but last on our priorities to replace. - 


Now, the new desk fills the space much better, and has more room to store things (and more junk :).


We have been blessed to have lived around so many wonderful people, and are incredibly grateful for those that make living in this neighborhood and community so amazing.  Thanks Rhett & Emily, we love it!!!

Monday, January 27, 2014

Client Pillows; Mixing Different Patterns

Mixing patterns can be stressful; however, you must remember that they don't always have to "match" to go together.

I just recently finished finding fabric and making pillows for a client of mine.  We wanted five different fabrics, and wanted to pull in coral/orange & turquoise colors into the room. 

Here is what we ended up with - 


The combination turned out great with the rest of her room!

Thursday, January 23, 2014

Simple Chair Makeover - Deciding When to Recover & When Not To

A few months ago, I did a consult in trade for two upholstered chairs that my friend was going to replace.  

Originally, I thought I would recover the chairs.  However, once I got them home and mulled over it, I decided that recovering them just didn't seem like the best route to go.

Back in 2012 I recovered this chair for another one my friends -

before:


after:


If you click here you can see the tutorial and process it took to recover it. 

As you can see in the before picture, the chair fabric was outdated and definitely not neutral for the lighter tones she was decorating with.  

Here is the picture of one of the two matching chairs I was working with -


Unlike my friends chair, this one was already covered in a neutral fabric.  The chair itself was in really good condition, the fabric was clean, and had no rips or tears.  I just couldn't come up with any good reasons why I should spend hours and hours and hours, and a gazillion staples later...just to get the same chair with a slightly different neutral fabric. 

However, the style wasn't quite modern enough for me and I spent some time thinking how I could change things up.

I love nail-head trim so I thought that would be a good start.  The other thing that bothered me was the "T" cushion you sit against.  It just wasn't working for me, but my husband said the chair wasn't comfortable without it. :/  (I know, I know, I already told him decorating goes with the saying, "beauty is pain"...didn't fly). So, I took that "T" cushion and sewed it into a plain square. 

Here is what I ended up with! -


I used 5 packs of nail-head trim, bringing my total to $10.

Not a bad price for a 'new to me' piece of furniture. :)