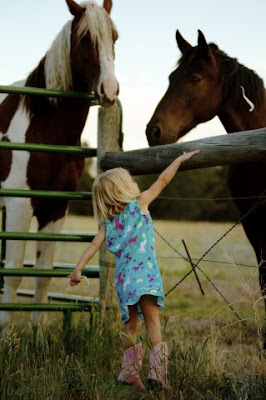
About 10 years ago, my father purchased an 800 acre ranch in southeastern Colorado. Since then my children have grown up riding horses which in return has created a passion and obsession for my youngest two girls with these beautiful creatures.
These two have shared a room since my youngest grew out of her crib eight years ago.
So naturally when it came time to redo their shared room they both wanted it to be horse themed. I was excited to take on a new project, as well as the challenge of finding a happy medium for the three of us. I wanted to give them a classy horse themed room that they could "grow with". I mean, what teenager wants a horse themed bedspread? I know first hand that teenagers want a space that fits them, and rightfully so...it's their haven from the stresses of adolescence.
The girls and I agreed on a very neutral color scheme. I really had to watch pricing, purchasing two of everything really adds up! Creams, tans, browns and lots of white was what we decided on.
I created a rustic planked wall to offset all the cream, tan, and white bedding; however, decided not to take it all the way to the top of the wall...
I purchased and combined the bedding from several different place, Ikea, Wayfair, Target, and Bed Bath & Beyond. The headboards are from Pottery Barn Teen.
The dressers are from Ikea, and the end table is from Joss & Main.
My talented neighbor Kaylie painted these two watercolor horse prints for me. They are gorgeous and I am completely enthralled with them!
You can contact her at:
Kayliek@comcast.net
I originally intended to separate them and put one above each girl's dresser; however, once I had them in the room I couldn't separate them. They compliment each other so much and the size looks better together.
The only problem is that left the other dresser bare. Big bummer. Kaylie is so talented she inspired me to give it a whirl and try my hand at painting another for the other side of the room. It came out alright, definitely nothing compared to hers...but it works in the space! You can't tell from the pictures, but I put hers on the side you immediately see upon entering the room. ;)
The room is L shaped with a smaller area and large window. My oldest kept begging me to build a window seat that she could curl up and read a book on. I thought it was a brilliant idea and found some darling horse fabric at Fabric.com to create pillows for it...
I found the crates at Walmart and stained them a dark walnut color. I added felt bottoms so they could slide them in and out for their books. I found this pendant light at Ikea for $30 and thought it looked kind of "barney". I sprayed it an oil rub bronze and cut off the plug in part to hardwire it into the ceiling box.
One of the last touches I added to the wall was a large collage of my girl's riding and fond memories of them over the years at the ranch. Underneath the collage I hung my grandmother's horse whip that I treasured as a young girl.
My girls love how it turned out, which is good...because it isn't changing any time soon. ;)


